Overview
PDS Project Sync is created for two way schedules synchronisation, specifically, for:
- Opening projects in Microsoft Project Professional / Desktop Client from Project for the Web, editing (tasks, assignments), and saving changes to Project for the Web
- Saving projects created in Microsoft Project Professional / Desktop Client to Project for the Web.
Installation
Login and Download the Add-in
To install PDS Project Sync follow the link Home - Project Data Suite (projectdata.io/) (https://app.pdms.io/) and click on either «Login» or «Sign UP», depending on whether you have an account already created or not.
Important: add-in installation is available only in the Microsoft Edge browser.
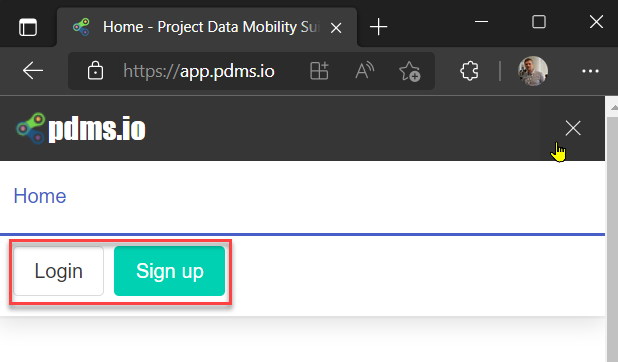
If you do not have access, you need to click the "Sign UP" button and select which account you want to access. After requesting access, you will receive an email granting access.
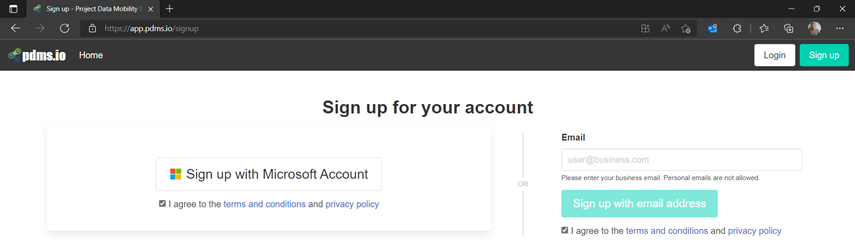
If you already have access, you should click the "Login" button and then click in the new window "Login with Microsoft Account" and log in using the account that was granted access.

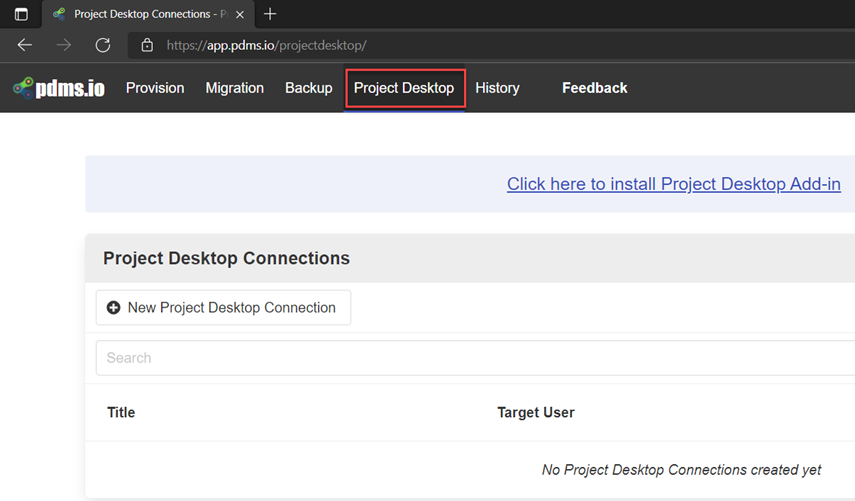
After a successful login, you will be redirected to a page of the site, where you need to navigate to the Project Desktop section.
In this section, by clicking on the link «Click here to install Project Desktop Add-in» (https://msproject.pdms.io/PdmsProjectAddIn.vsto) you get the opportunity to download PDS Project Sync.
Add-in installation
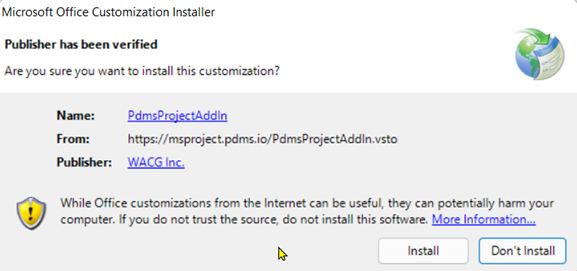
Immediately after downloading, the Microsoft Office Customization Installer will start, in which you should click the "Install" button.
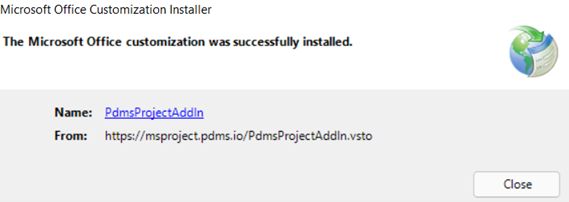
After a while, you will receive a notification that PDS Project Sync has been successfully installed.
Configuration
Once the PDS Project Sync has been installed, you can run Microsoft Project Professional/Desktop Client.
Configuring PDS Project Sync in Microsoft Project
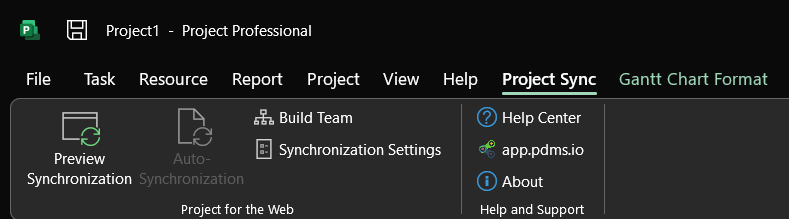
The next important step after installation is to set up PDS Project Sync, To do that you need to navigate to the "Project Sync" tab and click on the "Project Synchronization" button, and after that, a window will open in which you will need to log in using the same credentials that you use to log in to the https://app.pdms.io.

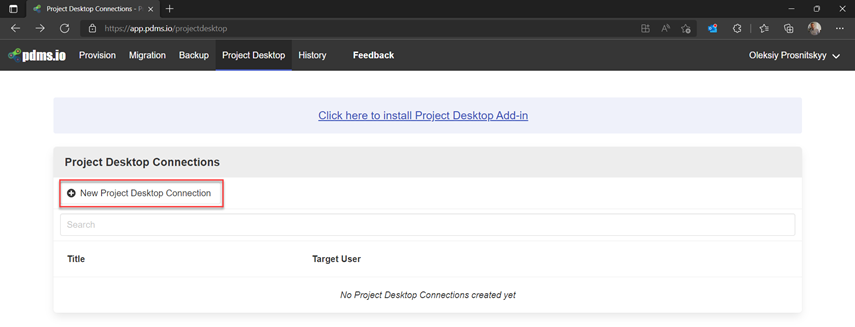
If this is your first time configuring, you will need to create your first connection to the Project for the Web environment. To do this, you must click the "New Project Desktop Connection" button.

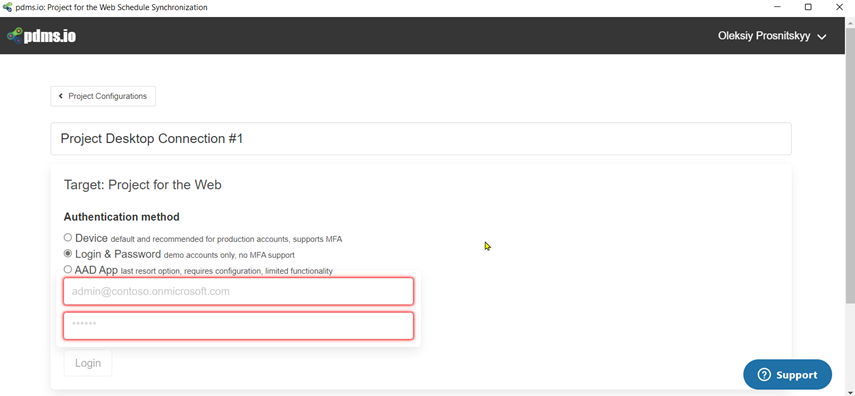
The authentication method is selected depending on which method is selected in your company and after that, you need to click the "Login" button.
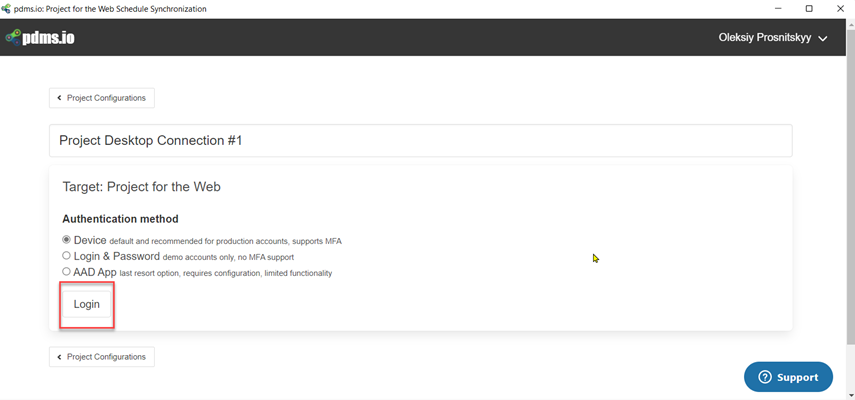
If you have disabled two-factor authentication, you can select the "Login & Password" option and enter the login and password for accessing the environment with Project for the Web.
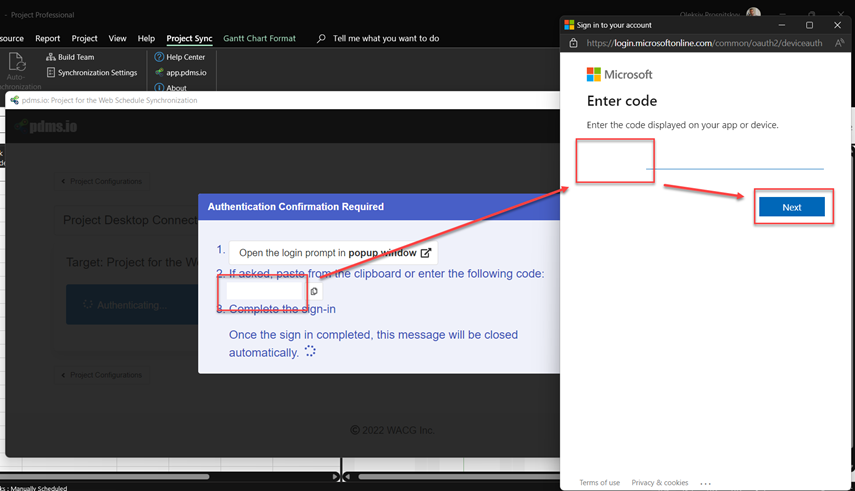
Immediately after clicking on the "Login" button, a dialog box will open in which you will need to insert a confirmation code and click "Next".
Please note that the confirmation code is copied to the Clipboard automatically, you just need to paste it to the “Enter the code displayed on your app or device” textbox.
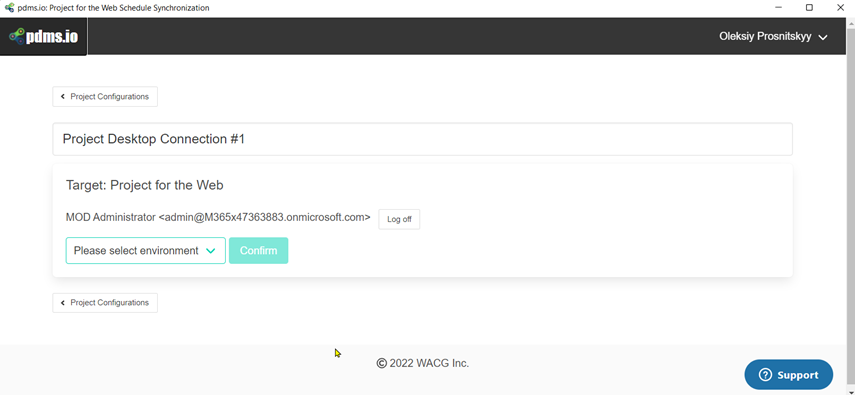
As soon as a successful authorization process takes place, you will automatically be redirected to the settings page, where you will be able to select the environment.
Configuring PDS Project Sync via Website
You can also go through the setup process on the website. The process is completely identical, so you can proceed to the review of working with the product.
PDS Project Sync Usage
Opening and editing current project from Project for the Web environment
How to open a project from Project for the Web
To open the existing project schedule in Project for the Web in Microsoft Project Professional / Desktop, first of all, you need to select the environment, and then click the "Confirm" button.
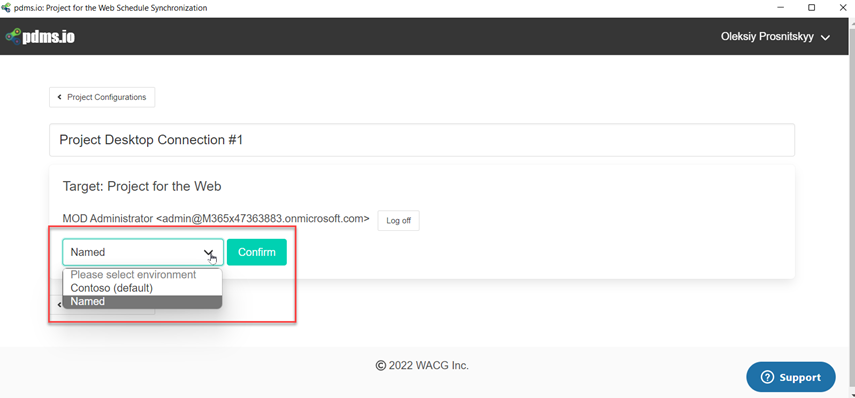
After checking access, you will be able to see a list of all projects from the selected environment.

After selecting the project, click the "Synchronize" button.
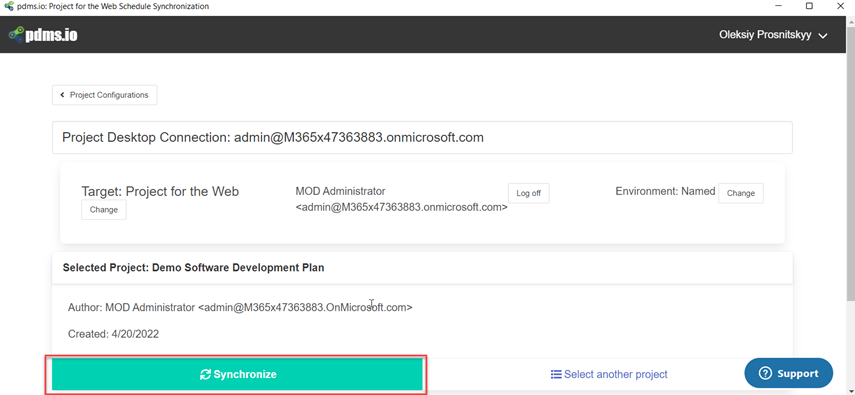
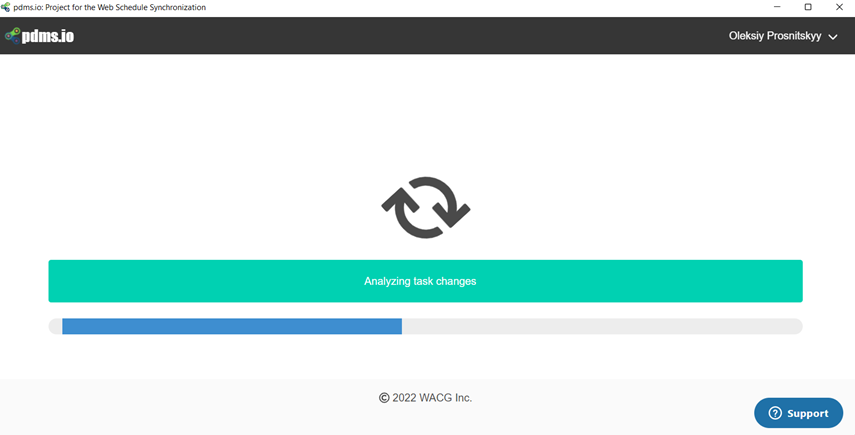
After that, the process of analyzing the chart and synchronizing it will begin.
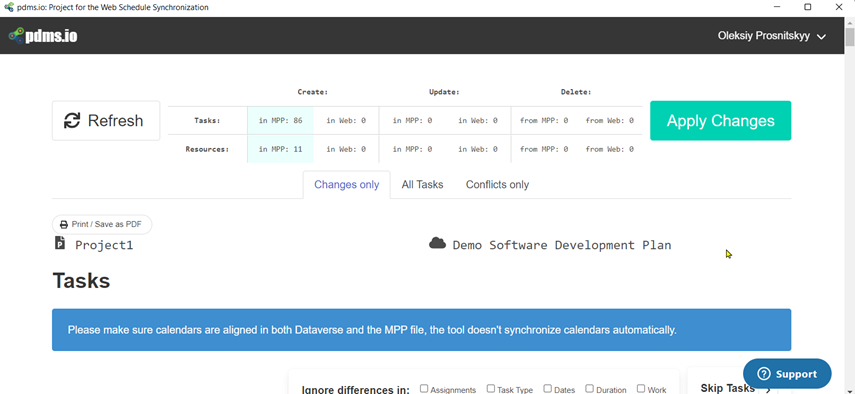
As soon as the synchronization process is completed, in the window, you should click the "Apply Changes" button, which will lead to the creation of a project schedule in Microsoft Project.
As soon as the synchronization is over, click on the "Close" button.

You can now work with the project timeline in Microsoft Project.
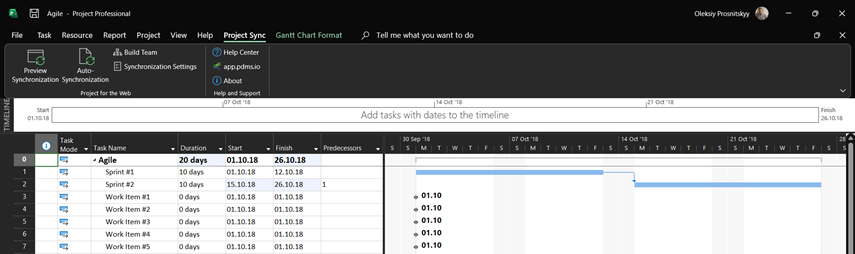
Syncing Changes in Microsoft Project
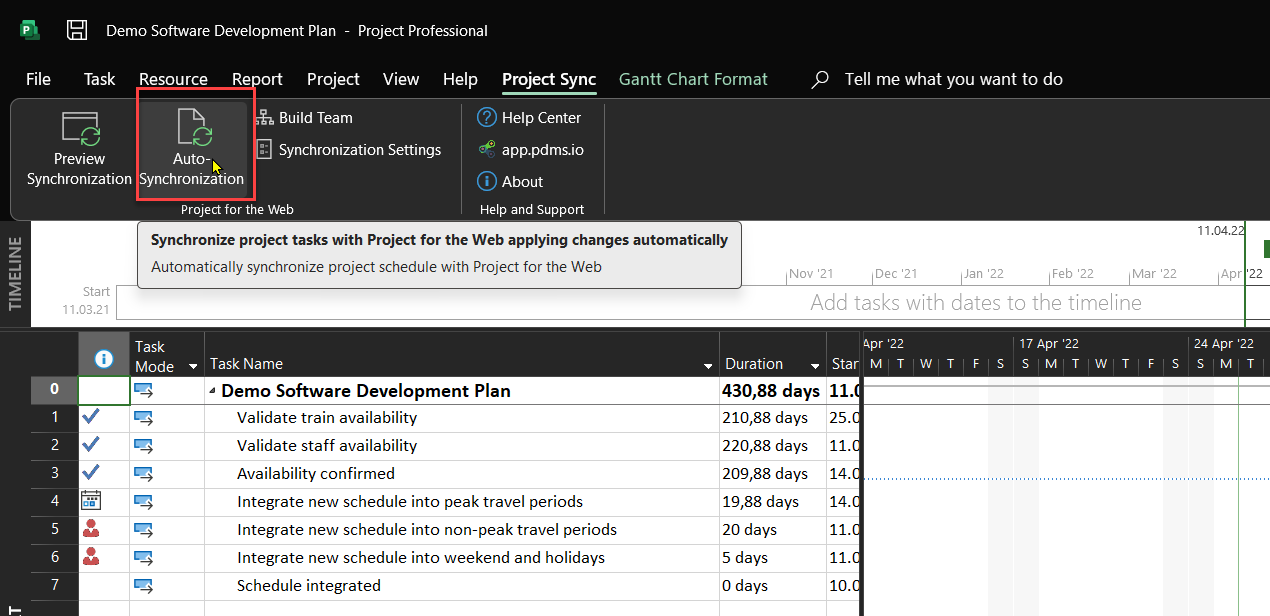
If you make changes to the project schedule and for these changes to appear in the project schedule in Project for the Web, you must click the "Auto Synchronization" button.
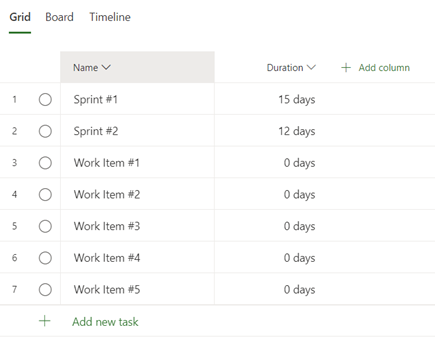
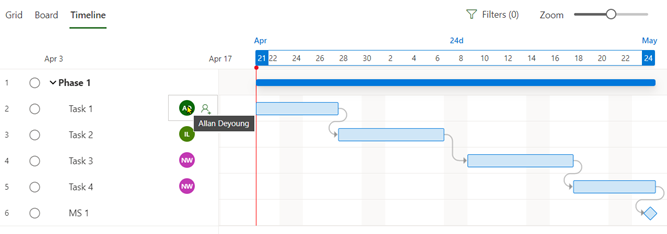
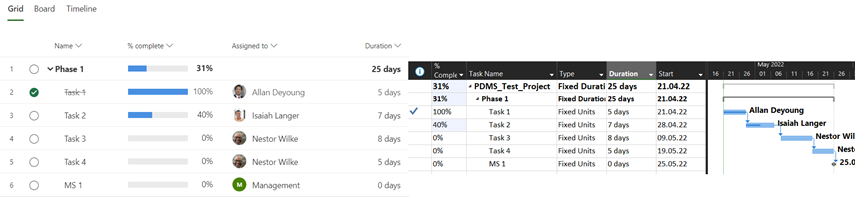
The result of updating the project can be seen in Project for the Web.
Creating a new project in Microsoft Project Professional/Desktop
PDS Project Sync allows you to create projects first in Microsoft Project Professional/Desktop and then save them to the environment with Project for the Web.
To upload an existing project, it is recommended that you first save it on your computer. Otherwise, the project will be uploaded with the default name (like Project1, for example).
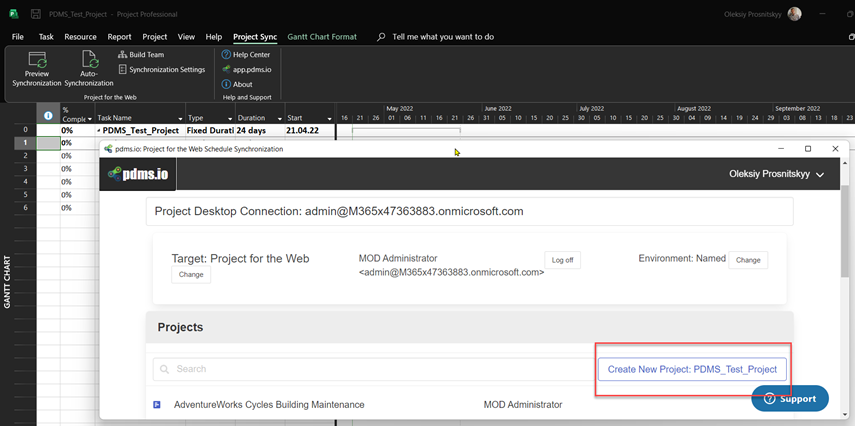
To upload the project, you need to click the "Preview Synchronization" and "Create New Project" buttons.

Once the project has been created, the Synchronize window will display a "Synchronize" button that you can click to synchronize tasks from an existing Microsoft Project to Project for the Web.
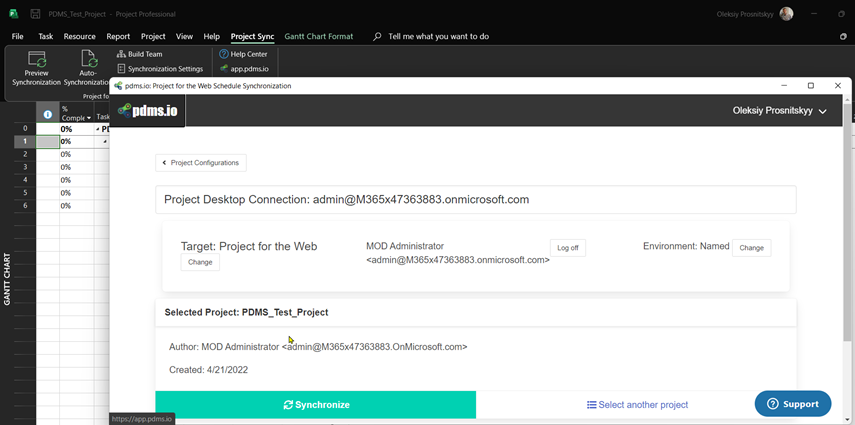
After the synchronization is completed, the "Apply changes" button will appear.
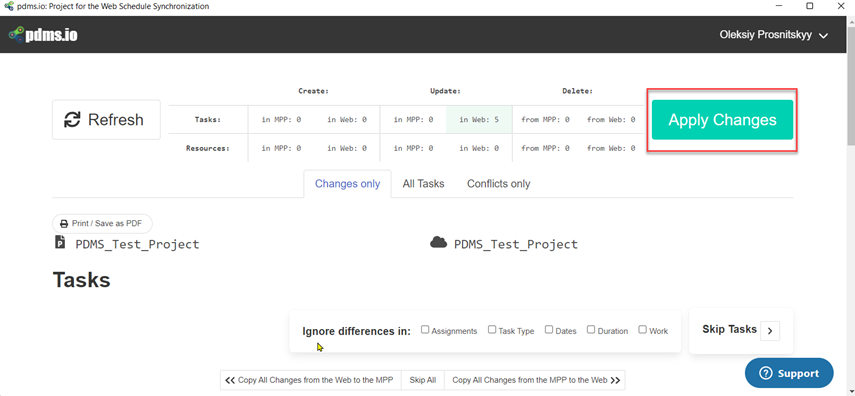
The created project can be seen in the Project for the Web environment.
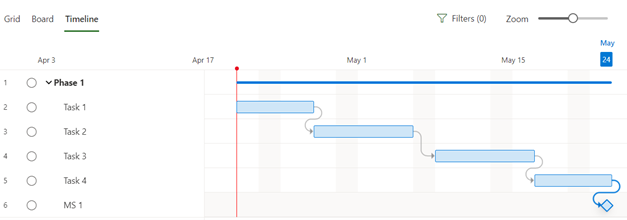
Assigning resources from Project for the Web environment to schedule in Microsoft Project
After synchronization, you can assign resources from Project for the Web to project tasks in Microsoft Project.
To do this, you need to click on the "Build Team" button and in the "Build Team with Project for the Web Resources" window, move to the right, in the "MPP Resources" area, the resources that you plan to assign to project tasks.
To add resources to the project team, you must click the "Apply Changes" button.
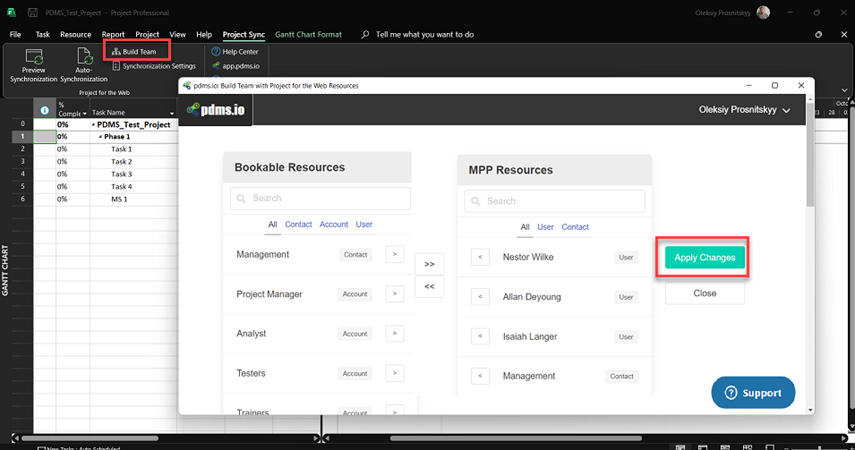
Assigning resources is no different than assigning resources in Microsoft Project.
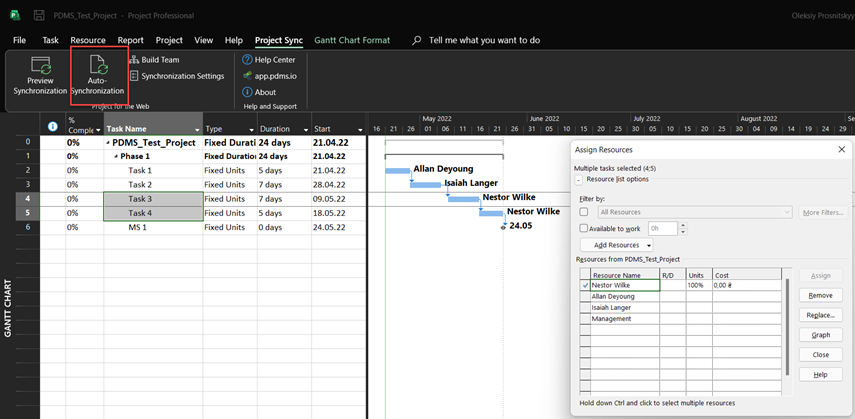
Once assigned and required to sync, the assigned resources will also appear in the Project for the Web schedule.
Resolving Conflicting Changes in Schedules
Separately, it is worth considering the situation when there is some difference in the project schedules in Project for the Web and Microsoft Project. For example, there may be a difference in the timescales, the links, assignments, and the percentage of completion.

How do synchronize correctly so that at the end the data in both charts will be the same?
To analyze the difference, you should first click the "Preview Synchronization" button.
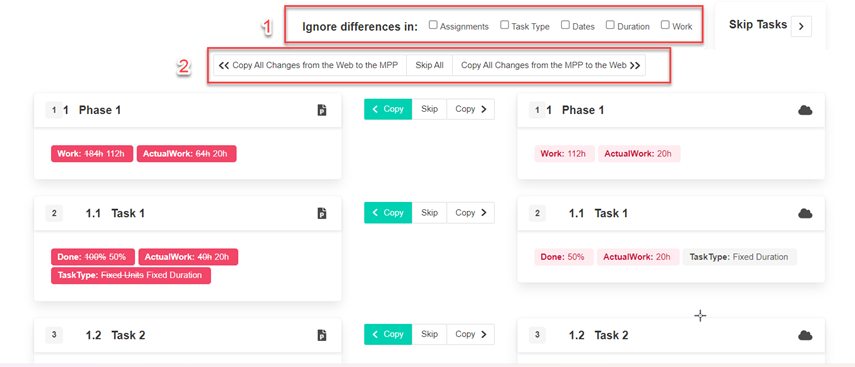
In red, you will see the discrepancy between these schedules.
Let's take a look at these inconsistencies.
For example, on the left side of the summary task level, you can see from the timeline in Project for the Web that there is a difference between work and actual work.
On all tasks, you will see notifications that there is a mismatch between task types. To avoid such an error, it is recommended that you immediately create tasks in Microsoft Project with the type that is set by default in the Project for the Web environment.
You can also see that there is a difference in the percentage complete at Task 1 - the percentage complete in Project for the Web is 75, and in Microsoft Project, it is 100.
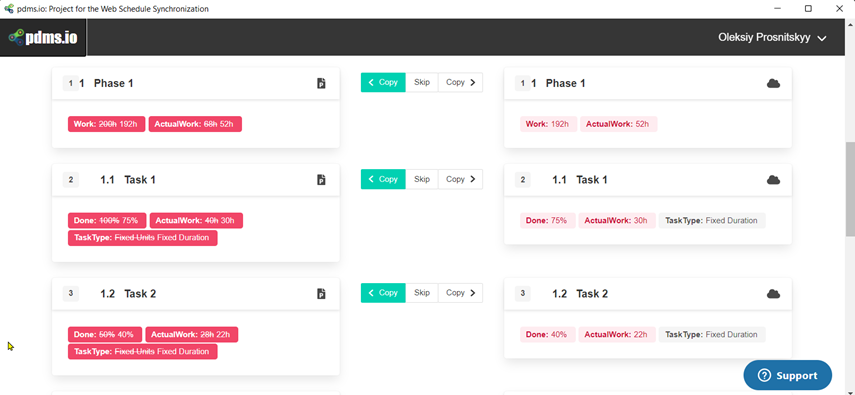
To decide which data should remain consistent across project schedules, you need to choose the direction of copying from either Project for the Web to Microsoft Project or Microsoft Project to Project for the Web.
For example, in this case, a 100% completion percentage for Task 1 from a schedule in Microsoft Project will overwrite a 75% percentage complete in Project for the Web, and for Task 2, data from a schedule in Project for the Web (40% ) will overwrite the data (50%) in a graph in Microsoft Project.
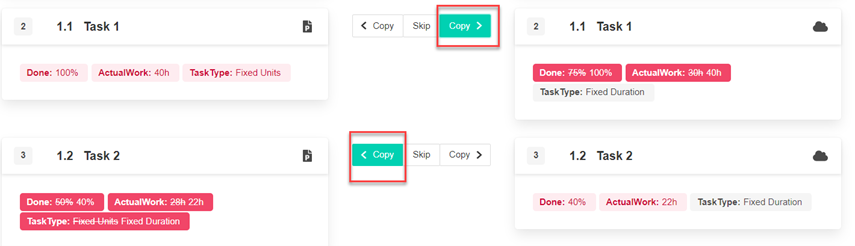
As a result of synchronization, the data in the two projects will become the same.
The user may also choose to either ignore all or some of the differences.
Also, the user can decide which data can be copied from one graph to another at once to avoid differences.